Dynamics 365 Online Portal Configuration
1) Go
to Dynamics 365 Central Administration Center

2) Click
on Application Tab

3) If
portal Add – On is not configured it will show as point 2 and click on Portal Add-On and click on Manage button.

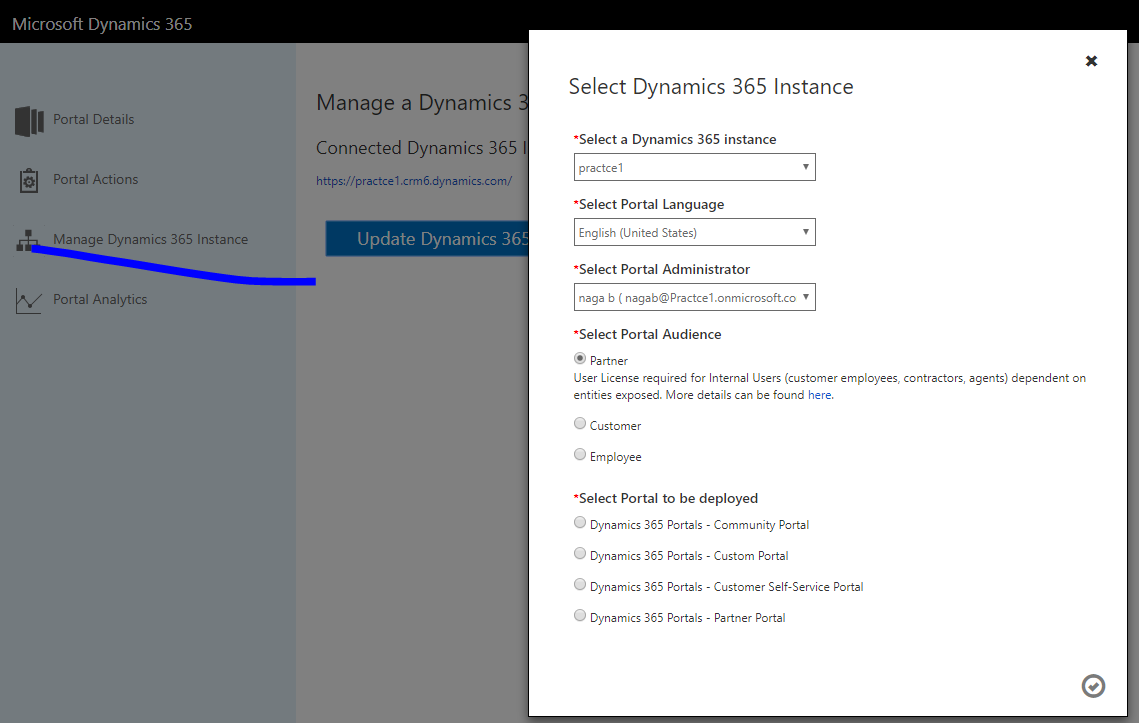
4) It will redirect to “Configure Your Portal” page
Enter name, Portal URL and Select Dynamics 365
Instance

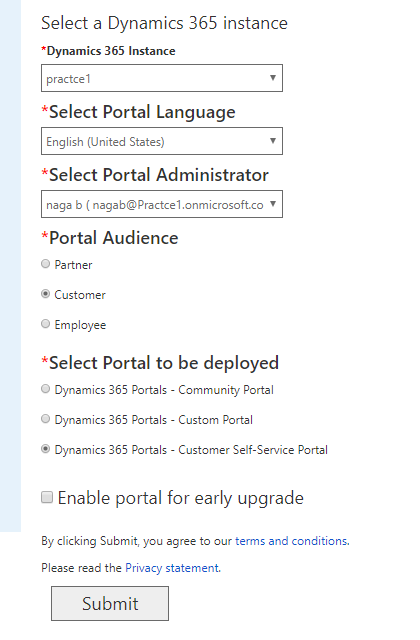
5) Then
system will ask for Select Portal language, Portal Audience and Portal to be
Deployed. Click on Submit button.
6) Prompt
for Terms of Service and click on Accept button.

7) System
redirected to below page and click on here after some time.

8) There
will be another three left navigation buttons available in Portal Details page


9) Go
to Dynamics CRM 365 and go to Settings >> Solutions, we can observe there
are three manage solutions installed automatically for self-service portal.

10) There
is new tile (Portal) appear in Site Map.
